Showing posts with label Food. Show all posts

9/9/13

Mexican Chocolate Latte recipe


Chocolate and coffee.  Coffee and chocolate.  These two things would be on my "favorite list"... if I had one.  I think most of you will agree with me (if you don't, I need to have a serious talk with you) that, chocolate is good, and coffee is good.  Why not combine the two?  This is what I had been thinking about for a while.  I had been quite "iffy" as to if chocolate and coffee could mix well together, but I took a leap of faith (it's a big leap of faith, huh?) and tried it...  and even surprised myself.  It turned out really well! and with the other flavors that I added, they gave an added boost to the coffee.  Have you ever had abuelita chocolate?  Well, it is an amazing mexican chocolate that is supper tasty  and that can be used in hot chocolate.  This coffee resembles some of the flavor that abuelita chocolate has, I think... hence the name.  

After making this coffee, to be honest, I was still a little nervous that it just looked a lot better than it was going to taste...  After taking a few sips I began to do my usual "oh-my-gosh-it-worked/this-is-the-most-amazing-coffee-ever" dancing and a few happy squeals...  I told my mom that she just had to try it, so she did, and I got the usual sour look that I get from her after she tastes my coffee.  Don't worry, it's not that she was against the particular coffee, she just doesn't like coffee in general....  On another note: these are some of my favorite food photographs that I've taken yet.  I pretty much love everything about them; doesn't the whole shoot just remind you of fall?   P.S.  Just because the whipped cream has english toffee flavoring, don't get the idea that it tastes like english toffee, because it doesn't...  The flavor is very light and just compliments the rest of the ingredients.  Oh, and thank you Mary, for letting me borrow your beautiful mug.... ;) Ok, I think I've talked long enough... let's make a good ol' cup of mexican chocolate latte, shall we?

Mexican Chocolate Latte

for the coffee:
ground coffee for one
1/2 tsp cocoa powder
1/4 tsp cinnamon 
1/4 tsp nutmeg

for the whipped cream:
1/4 cup cream
1 tsp cocoa powder
1 tsp nutmeg
1 Tbsp sugar
2 tsp real maple syrup
3 drops of english toffee flavoring

Add the ground coffee, cocoa powder, cinnamon, and nutmeg to a coffee filter and brew coffee as usual.  In a glass bowl, whisk together the cream, cocoa powder, nutmeg, sugar, maple syrup, english toffee flavoring until it is light and frothy, about 2 minutes.  Pour your coffee into a mug then add the whipped cream on top; drizzle some of THIS chocolate sauce on top to finish it off.  Enjoy this little treat by a camp fire or inside on a cool fall night.


Pin It

9/4/13

Flourless Chocolate Cake recipe

This flourless chocolate cake has been a staple for us this summer.  It is so incredibly easy and is great for those who are gluten free (ahem, sisters).  This cake is so light fluffy and isn't overly sweet and heavy like some others; it is the perfect go-to recipe when your sweet tooth is bothering you. It can never disappoint.  Try it, you won't regret it. 

Flourless Chocolate Cake      recipe from here

6 Tablespoon unsalted butter, plus more for pan
8 ounces bittersweet or semisweet chocolate, finely chopped (I used chocolate chips)
6 large eggs, separated
1/2 cup granulated sugar
THIS chocolate sauce

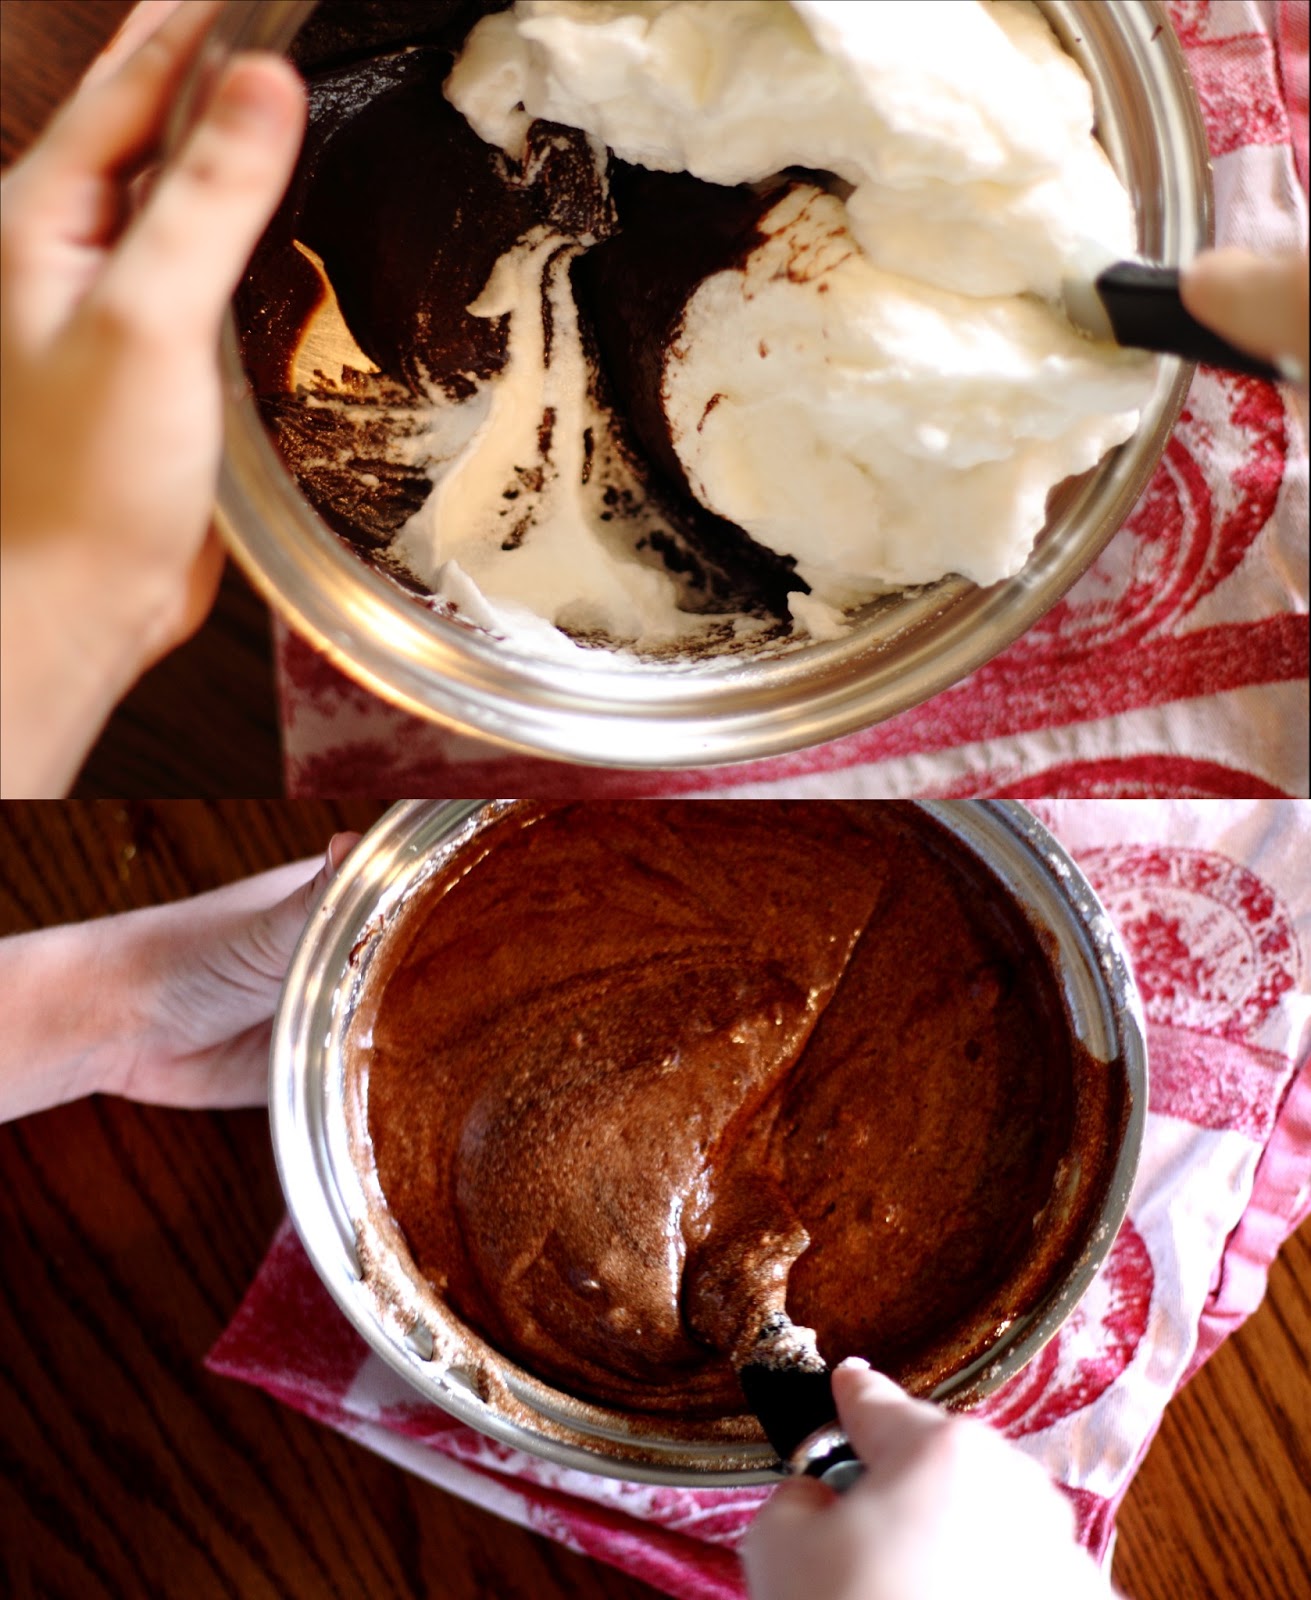
Preheat your oven to 275 degrees with the rack in the center.  Butter the bottom and sides of a 9-inch springform. Set aside.  Place butter and chocolate in a large heatproof bowl and microwave in 30-second increments, stirring each time, until completely melted.  Or if you rather not use a microwave, you can cook it on medium low heat stirring frequently just until melted, because other cooking can harden the chocolate.  Let cool slightly, then whisk in egg yolks.  In large bowl, beat egg whites until soft peaks form.  Gradually add granulated sugar, and continue beating until glossy stiff peeks form.  Whisk 1/4  of the egg whites into the chocolate mixture; then gently fold in remaining egg whites.  Pour batter, and smooth the top with a rubber spatula.  Bake until the cake pulls away from the sides of the pan and is set in the center, 45 to 50 minutes.  Cool completely on a wire rack; remove sides of pan.  Serve at room temperature with a drizzle of chocolate sauce.  


Pin It

9/2/13

Chocolate Syrup recipe

Have you ever read the ingredients of the chocolate syrup that you buy at the grocery store?  Let's just say I can't pronounce half of them, whereas you know what exactly is going into this chocolate sauce.  It's so simple (ever for beginners) to make and takes less than 15 minutes from start to finish.  It may not make it into the "healthy" category, but, it is a step up from what is in the grocery store chocolate sauce.  So... this chocolate sauce, it is amazing, and slightly too good.  I just like to periodically open the fridge door with one hand and a spoon in the other and dip the spoon in the chocolate sauce.  Healthy?  Not so much, put it's a nice little treat every once in a while.  There are other uses for this sauce though, it's amazing on top of a big scoop of ice cream or it is also really good on top of flourless chocolate cake (coming Wednesday...).  Yum, yum!  I hope you try this recipe, because it is defiantly a keeper for us. 

Happy Labor Day!  How are you planning on spending it?  For me I'm going to spend it doing some odd jobs that need to be done before I start school tomorrow and maybe make a peach pie...  (I've really  been wanting a peach pie lately)   

Chocolate Sauce        recipe for The Fannie Farmer Cookbook
2 Tablespoons butter
2 ounces unsweetened chocolate
1 cup sugar
pinch of salt
1/2 cup water
1 1/2 teaspoon vanilla

Put the butter and chocolate in a heavy-bottomed saucepan and stir over low heat until the chocolate is melted.  Remove from the heat and stir in the sugar, salt, and water.  Beat until smooth, return to moderate heat, and cook, stirring often, for about 5 minutes.  Remove and cool a little, then add the vanilla.


Pin It

8/19/13

Creamy Vanilla Bean Coffee recipe


Wednesday of last week was the first day that it felt like Summer was leaving us and Fall was quickly approaching.  It made me happy, because I love Fall... everything about it, except school of course.   As I started to think of all things Fall related, I began dreaming of coffee, what else?  I got it in my head to use a vanilla bean that had been sitting in the pantry just waiting for a purpose to come along in my next coffee creation.  This was a first time for me using vanilla beans, and now I can honestly tell you that I'm in love with them....  The flavor is so much richer than the vanilla extract that we all use, and besides, vanilla beans are such a special and decedent treat.  Who wouldn't want coffee with fresh vanilla bean in it?    


Warm Vanilla Bean Coffee
4 cups coffee of your choice
1 1/2 cup cream
1/2 vanilla bean
1/8 tsp. nutmeg
1/8 tsp. all-spice
3 Tbsp. brown sugar

Prepare you coffee of choice and keep it warm.  Slit your half of a vanilla bean in half long ways and scrap out as many of the seeds as possible.  Put your cream in a saucepan and add your vanilla bean skin and seeds, nutmeg, all-spice, and brown sugar over the lowest heat.  Mix together and let steep for 5-8 minutes, don't let it boil.  Take off heat, take out vanilla bean skin, and whisk for 2 minutes.  Pour your coffee between two mugs then add the cream mixture.  Enjoy this simple little treat.  


My model/fellow coffee loving sister, Mary
Pin It

7/15/13

Orange Julius recipe


Have you ever had an Orange Julius?  I personally have not, but I found this recipe on Pinterest and it looked so good in the picture, that I went on a lim... and made it. Real shocker, isn't it?  What drew me to make this drink was how simple and "different" it seemed from all the rest summery drinks.  You just have to try something new sometimes.  I made these drinks and it literally only took ten minutes from start to finish.  The process was so easy and fast, which is always nice right?

Okay, now that I've (hopefully) convinced you to make this drink, let me tell you what it tastes like... a creamsicle... which is pure awesomeness in my book.

Orange Julius  recipe via here
1 can (6 ounces) frozen orange juice concentrate, thawed
1 cup milk
1 cup water
1/4 cup sugar
1 teaspoon vanilla extract
10 to 12 ice cubes

In a blender, combine the orange juice, milk, water, sugar and vanilla. Cover and blend until smooth. With blender running, add ice cubes, one at a time, through the opening in lid. Blend until smooth. Serve immediately. Yield: 4-5 servings.

Pin It

7/10/13

Warm Almond Creamer recipe

Ever since I made coffee (and tried it) for the first time, I loved it... and I still do.  I love the deep flavor that coffee has and all of the possible flavors that it can take on.  A couple of weeks ago, I made creamer for the first time.  It is so incredibly easy to make and great to use when you're in a rush, all you have to do is brew some coffee and pour some of this homemade creamer in, and bam, you have yourself one awesome cup of coffee. 

Warm Almond Creamer

2 cups cream
1/2 tsp. all-spice
1/2 tsp. nutmeg
2 cinnamon sticks (mine were about 3" long)
2 Tbsp. brown sugar
2 1/2 tsp. almond extract

Cook (don't boil) the cream, all-spice, nutmeg, cinnamon sticks, and brown sugar over lowest heat for 10 minutes.  Take the mixture off the heat and add in the almond extract.  Store in an airtight container in the refrigerator.  Make sure you shake the creamer before you use it, because the ingredients will separate. It can last up to a week. 


Pin It

7/8/13

Grilled Seasoned Chicken recipe

Chicken and the grill just go to together, like two peas in a pod.  Chicken can be very flavorless on its own, but with a little help from spices and the grill, it can become something decedent and special.  To be honest, when I was making this recipe, I was a little worried about all of these spices and herbs that I was combining.  They were all very different, but together, they formed a whole new and beautiful  flavor.  Ah, and the grill.  I seriously love the grill, call me weird if you must, but I do love the grill.  Grilling the chicken enhanced all of the flavors from the spice rub, and then added some.  Overall, this is the perfect summertime meat for any occasion; family get together, picnic... you name it!  

Grilled Seasoned Chicken

brine
1 chicken cut into pieces
1/2 cup salt
water

spice rub
1 tsp. All-spice
2 Tbsp. paprika
1 1/2 tsp. fresh rosemary
11/2 tsp. fresh oregano 

sauce
2 tsp. fresh chives
2 tsp.  fresh oregano
3 Tbsp. honey
6 Tbsp. worcestershire sauce
4 Tbsp. butter

Cut a chicken into pieces and set in a large bowl.  Fill the bowl with water until it covers the chicken and pour in the salt.  The brine helps the meat become tender and juicy.  Let the chicken/water/salt mixture sit for 2-3 hours.  Combine your all-spice, paprika, rosemary, and oregano in  a small bowl.  Drain the salt water off of the chicken and pour your seasonings over top of the chicken. Get your hand in there and make sure that all of the chicken is coated with the spice rub.  Put the chicken in a bag or put plastic rap over the bowl and put it in the fridge for about an hour.  At the end of that hour, turn on your grill and prepare the sauce.  Take the chicken out and put it on a hot grill.  Let it cook for 5-7 minutes on medium heat.  Don't go too far away from the grill while the chicken is cooking because the chicken can catch on fire.  So check the chicken often and always have a glass of water on hand.  After the 5-7 minutes, turn the chicken pieces over and cook for an other 5-7 minutes.  After the chicken is done on the grill, place it in a casserole that has a lid and pour the prepared sauce on top.  Put the lid on and place the casserole in a preheated 325 degree oven.  Cook for 1 1/2 hours.  Serve as is and enjoy!  I would love to hear from you if you make this!  

P.S.  I doubled this recipe, that is why it looks like there's a ton of chicken.


Pin It

7/3/13

Iced Sun Tea recipe


I don't know about you and your family, but me and my family drink iced tea like southerns (except for a curtain sister-in-law of mine, who refuses to like tea)... ;) In the summer time, it is very unusual not to see a gallon jug of tea in the fridge or soaking up the sun on the sidewalk.  Seriously, if you want to know where I live, just look for some tea sitting out in the sun.  Iced sun tea is defiantly a staple for us in the summer, especially during hay bailing time.  A couple weeks ago (while I was making sun tea, of course), I realized that it was high-time that I shared the recipe with you.  Have you ever had sun tea? Iced sun tea holds such a deeper and richer flavor than just regular iced tea, which makes it so special and yummy. 

Iced Sun Tea recipe
3 large Lipton tea bags 
1 gallon glass jug
1 cup sugar

Fill your gallon glass jug full of cold water and add your tea bags.  You can put in a few mint leaves to add a little more flavor if you like.  Set the tea out in the direct sunlight and let it ferment for a couple of hours, until it is a nice rich color.  Take out the tea bags (and mint leaves if you used any) and stir in the sugar with a wooden spoon.  Note: use a wooden spoon, not a medal one.  We have had way to many experiences where the jug breaks by using medal spoons to stir in the sugar.  Yes, not fun.  Pour in a cup full of ice and enjoy! 


Pin It

6/5/13

Decadent Iced Latte recipe

So, do you know what my new favorite drink is?  Iced coffee.  It is purely amazing.  This was my first time making it, and actually trying it.  Terrible right? Well, I new that this summer I just had to make and try iced coffee.  Today was hot and just seemed like the perfect day for a nice cool treat, so I got to work at figuring out my flavors and writing down the recipe as I went along.

...

and oh my gosh, this iced coffee turned out amazing.

The sweet whipped cream made an awesome film on top and balanced out the bitter coffee to make a lovely combo. Oh, and you can't forget the chocolate on top! This made the iced coffee even more decedent than it already was... and made it look pretty. Defiantly going to be making this iced coffee more this summer for my coffee loving siblings.    

Iced Coffee  serves two
3 cups brewed coffee

1 cup cream
4 Tbsp brown sugar
1 tsp cocoa powder
1 Tbsp real maple syrup

2 Tbsp chocolate syrup

Fill 8 icecube molds of a tray and put in the freezer.  It will take roughly 2 hours for the coffee cubes to freeze, so try to be patient (I know, I know, it's very hard).  Put the rest of the coffee in the fridge.

After the coffee cubes are almost ready, you can start to had the cream, brown sugar, cocoa powder, and maple syrup in a bowl.  Whisk the mixture very vigorously for two minutes (your arm might get a little tired, but it's good for you).  The mixture should be frothy and light.  Divide the coffee cubes between two glasses, pour the coffee overtop, then the cream mixture on top of that.  Now watch, some of the cream mixture will sink to the bottom, this is my favorite part...  Now, for the finishing touches, drizzle the chocolate syrup and sprinkle some brown sugar on top.  There you have it, a decedent treat for the heat.   

P.S. My frequent coffee taste tester/sister-in-law, Jordan, commented on how much the whipped cream tasted like Starbucks.  I'll take that. *smile*

P.P.S.  I made a Facebook page for my photography!  Please check it out!  Joanna Christine Photography 


Pin It

5/23/13

Lucy watching, coffee drinking, and s'more eating.

On Monday, my sister Mary, her husband Cody, and babies Sebastian and Bruno, came up from NC to OH, where they will be living for the summer before they leave for Germany in the Fall....

  Most of you know that I have a love for I Love Lucy, well, thankfully I have a sister that shares this love with me (maybe just not to the same degree as I).  Tonight we were watching a certain I Love Lucy episode that had donuts and coffee that played big roles, this made Mary and I have a sudden craving for, you guessed it, donuts and coffee.  We quickly paused the episode, headed to the kitchen, where we proceeded to make coffee, s'mores, and butter/cinnamon bagels (we had to improvise for the donuts, sadly...).  After the yummy food was made, picture taking took place, as you can well see...  We then enjoyed the end of the awesome episode of I Love Lucy and the decedent and fattening food.  These kind of night are such special treats.  Now, please enjoy these very embarrassing photos of us.

Mary's "Lucy" face
When Mary got me out this mug she proceeded to say, "This mug is utter-ly ridiculous..."  haha, clever. ;)
^
|
imitating 
|
v

Pin It

5/20/13

Frozen Fruit Smoothie Recipe [Cool Down #1]

This is the beginning of a little series that I'm going to be doing this summer, it's called cool down, and I will post beverage recipes that I think would be perfect in the hot, very hot, summer time.  I'm starting it off with a classic frozen fruit smoothie recipe and will go from there.  Some other cool downs that I have in mind are, frozen milkshakes, homemade lemonade, iced coffee, and we'll see what else I come up with in the meantime...  Do you have any beverage ideas that you think would be perfect for the cool down?  Please share them with me!  Okay, now that you get the whole idea, let's start!

I LOVE fruit, seriously, if you gave me money to go to the grocery store, I would probably come back with nothing but raspberries, strawberries, kiwis, and every other fruit out there!  So, to quench my love for fruit, I like making fruit smoothies.  Sadly though, for some reason, I rarely ever make them!  I just always forget that fruit smoothies are always an option!  Anyway, it was a Sunday night, I was lazy and hungry, so I made these yummy frozen fruit smoothies.  Ah, and they were amazing!  They were the perfect beverage for a hot summer (and humid) night, were so easy to make, and were very filling.  Not to mention these fruit smoothies are very healthy for you, which is always a plus!  What else can I say, these fruit smoothies were amazing and you need to make them.  The end.

Frozen Fruit Smoothie serves 5
2 cup frozen raspberries
1 cup frozen blueberries
1 cup frozen strawberries
1 cup milk
2 1/2 cup apple juice
2 Tbsp lemon juice

Add all of your fruit into a blender, then pour wet ingredients on top.  Pulse until the fruit is all chopped up and everything is well combined.  You may want to add more apple juice or milk depending on the thickness you want.  These measurements made a nice creamy consistency that I could easily sip through a straw.  Yes, I will defiantly be making this again, very soon.

All pictures taken with my new lens!  Oh, and sorry for not blogging very much lately!  It has been pretty busy, but hopefully the end of June will mark the beginning of a calmer summer.

P.S. My sister and I are taking my cousins wedding photos in a few weeks!  Eeeks!
P.P.S.  It's 86 degrees out today.  Oh my, it's hot, I need another fruit smoothie. :)


Pin It